Highlights from the Webinar on LaTeX conducted on 28th October 2025
LaTeX is handy tool when it comes to research papers or thesis writing. Majority of journals which publish scientific discoveries, research, and reports, now prefer that the authors use LaTeX for submitting their final version of papers. In fact many journals provide their own templates for papers. It makes the paper writing and compilation easy, because the papers are output in PDFs in the format the journals prefer, and use for publishing the final versions at their websites or in print formats.
People who have been using MS Word since decades find it difficult to shift to LaTeX. Many people make a misconception as well, that LaTeX is only good, if you are working with lots of equations. Although, its true that LaTeX makes equation writing much easier, however, thats not the only thing that it does. It has lots of features that make it a better choice that MS Word. I will write a separate article on why I say this.
Today, on 28th October 2025, I was asked to conduct a Webinar on LaTeX. It was an effort on providing a small introduction to the LaTeX environment, so that students, researchers, scientists, and working professionals pick the right tool for their research writing. The webinar attracted 96 participants from different countries including Pakistan, China, and Turkiye. I provided a small brief of the software and directly went on to create a small project on overleaf.com.


Here are few of the example exercises and relevant code snippets we did in the session. This should help the participants review what they have learnt, and also the readers about some basics of LaTeX. I plan to record some videos later on for the Trainings pages on my website, and I will share them here as well in future.
Creating sections in an article
I firstly introduced on how we could build up the title, abstract, and author related information in a research paper. These tags are usually available in the templates provided by most of the journals. For instance, the title and authors to a document/paper could be added using the following commands:
\title{A new classification technique for data streams}

\author{Muhammad Usman}
Many journals have their custom-author tags that could be used to add institution details as well, for example, the IEEE's format looks like this:
\author{Muhammad Usman and H Chen*,~\IEEEmembership{Senior Member,~IEEE}


\thanks{The authors are with the School of Computer Science and Technology, University of Science and Technology of China, Hefei, China.}

\thanks{*Corresponding author (e-mail: )}

}
Remember that, although the title tag takes the information, it wont render the title on the page by default. You will need to use \maketitle command to print that.
Later on, I practically showed them how they could multiple sections within the paper, and build up a nicely formatted deep structure that includes sections -> subsections, etc.
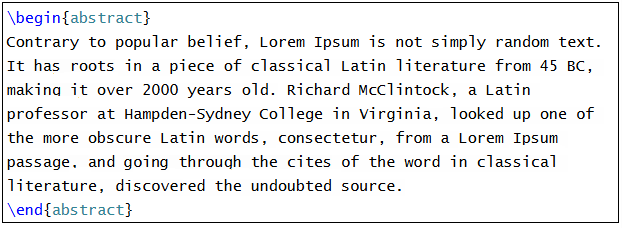
For instance, the abstract to the paper under <article> class could be added using:
\begin{abstract}[abstract-text-goes-here]\end{abstract}
An example abstract is given below:
The sections in any LaTeX document could be added using the following command:
\section{Introduction}[text to follow..]
This command adds a new section in the document, and gives it a number as well. The subsection command works the same way, i.e. using \subsection{}. There is another level in the section's hierarchy that could be created using \subsubsection{} command.
Using Tables
A simple Table structure in LaTeX and its result:
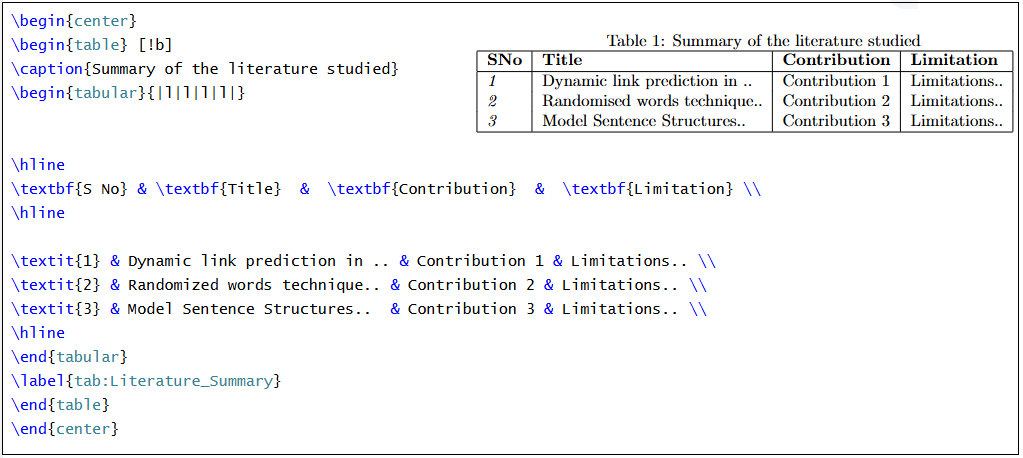
In the example above, firstly we are ensuging that the table appears in the center of the page. We do this using the \begin{center} command. The same should be closed using end{center}, such that everything within these two commands appears in the center of the page. Next, we being the table using \begin{table}. We follow the same rule of closing the same as we did while centering the table. The element [!b] tells the script to load this table at the bottom of the page. A [!t] command could be used to make it appear on the top of the page. The next command, i.e. \caption is used to provide a caption to this table. It appears with proper numbering system. The tag \hline prints a horizontal line at the start of the table. The \begin{tabular} command setsup the whole table. It uses the code \begin{|l|l|l|l|} which will define 4 columns in this table, and all are left aligned. You could make the text appear in the center or right using a c or p. For adding multiple rows in the table, every cell entry must be separated using & and the line should be closed/terminated using a \\. The two commands \textbf{} and \textit{} are used to convert the text to bold face and italic face. Another tag that is used at the end of the table is \label{}, which defines the ID of the table used for cross referencing. So if you use \ref{} command within the text using this ID, the table will be cited in the text.
Adding figures to the document
The figures are also easy to add in LaTeX:
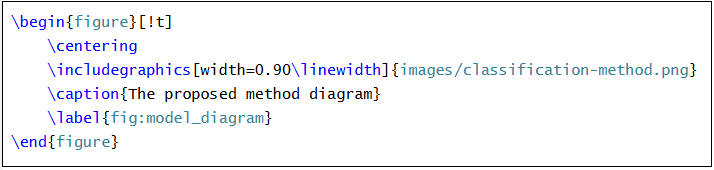
In this example, we are using the tag figure to draw a picture which should be top-aligned to the page. The command \centering makes it appear in the center. The next command, i.e. \includegraphics will import a picture from file system. Remember that it has its own parameters. In this example, we are using widthparameter, and we include a predefined tag that should be set to the image name. If you type this graphics command, it will automatically show you all images and PDFs in the folder that you have in the project. You could easily choose your images from there. It means, whatever media you want to use in this paper or document, must be uploaded in a file structure in the overleaf/latext project. In this case, I have created in images folder in my project and uploaded a picture. The next two commands are very similar to the ones we used in the table's case.
Inserting quotes within the text
If you are looking to add a quote to the paper (for instance, from a paper or web page or a book), you can use the following:

Developing equations in the LaTeX document
Here are few examples on how you could setup equations of different styles:
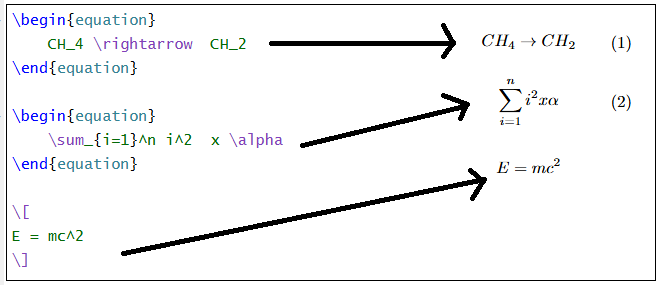
In the first two examples, we are using the tag equation to create equations, that makes them appear with a proper number. If you add a label tag to these equations, you can use them in text as a cross references as well. You will see some special characters appearing in the equations. For example, we are pring a right arrow that is used in chemical equations using \rightarrow command. We are also creating a Summation sign using \sum command. We see that some numbers and texts could be put in the superscript and subscripts using ^ and _. Here, remember that the text to be used in superscript and subscript must be enclused in {} in case there are 2 or more characters. Some Greek and other Mathematical symbols could also be used in the Latex, like we used \alpha. You can find the whole list in this link. To keep things simple, and without numbers, the equations could be created using \[\] setup, as in the third example above.
Making lists (bullet, numbered) in the document
Lastly, here are few bullet-oriented list and number-oriented list created using LaTeX code:
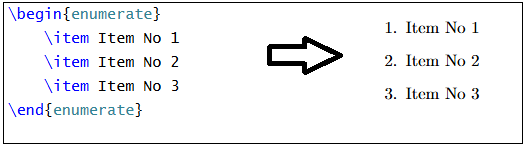
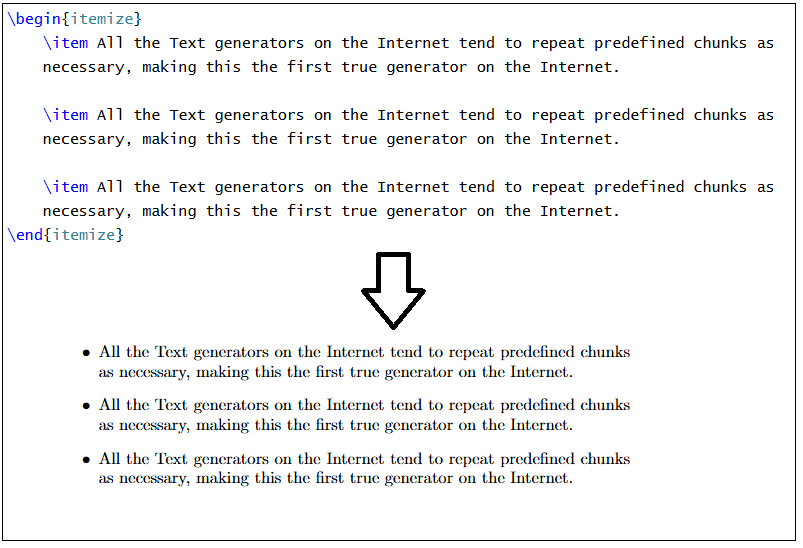
The first command will create a numbered list. Each item will be created using an \item command. You can use multiple lines as well. The second command will create a bullet list. Similar to the previous case, you may have longer texts spanning across multiple lines.
The code of these examples could be downloaded from here: Click to Download
Like I said earlier that I will try to prepare a video describing every component in LaTeX required for publishing articles, you could check back my website later. You could also contact through email if urgent help is required on latex.
Need Help with Your Literature Review, SPSS Analysis, Artificial Intelligence, Data Science, or LaTeX?
Whether it's for your thesis, assignment, or research project, I offer one-on-one guidance and support.